


Window treatment installation guide: DIY steps for a polished home
Installing window treatments is one of the most rewarding home upgrades you can make, yet many homeowners stall at the first step. The process looks complicated from the outside, but with the right plan, it moves quickly and delivers results that genuinely transform a room. This guide walks you through every stage, from picking the right style to hanging the final panel, so you finish with a polished look and zero guesswork.
Table of Contents
- Why window treatments matter in your home
- Gathering your tools and materials
- Choosing the best window treatment for each room
- Measuring your windows: The crucial step
- Step-by-step window treatment installation
- Troubleshooting and common mistakes
- What to expect: Results and finishing touches
- Designer fabrics and expert help for your next project
- Frequently asked questions
Key Takeaways
| Point | Details |
|---|---|
| Proper tools matter | The right tools and prep work prevent common DIY mistakes and guarantee sharp results. |
| Accurate measuring is key | Careful measurements are crucial for seamless custom installations. |
| Choose style by function | Picking the right treatment for each room boosts both looks and energy efficiency. |
| Step-by-step method ensures success | Following systematic installation steps delivers a flawless, professional finish. |
| Expert help is available | High-quality materials and experienced pros are just a click away to upgrade your home’s window decor. |
Why window treatments matter in your home
Window treatments do far more than block sunlight. They shape how a room feels, how private it is, and how much you spend on heating and cooling. Getting them right pays off in comfort and dollars.
Here is what well-chosen window treatments deliver:
- Privacy without sacrificing natural light
- Temperature control that keeps rooms warmer in winter and cooler in summer
- Style and cohesion that ties a room’s decor together
- Noise reduction from street traffic and neighbors
- Increased home value through a custom, finished appearance
The energy savings alone make a strong case. Proper window treatments cut energy costs by up to 25%, which adds up fast over a full year of utility bills. Beyond the numbers, the impact on home comfort is something you feel the moment you walk into a well-dressed room.
“The right window treatment turns a bare, drafty window into a design feature that works hard for your home every single day.”
With those end goals in mind, let’s look at what you need before getting started.
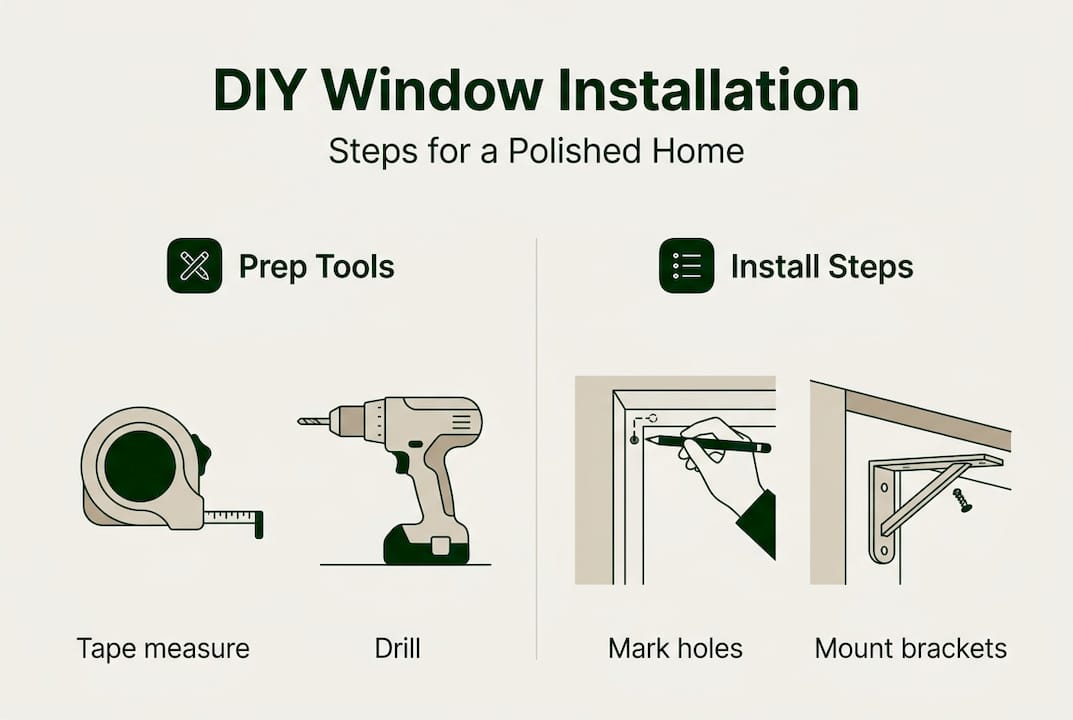
Gathering your tools and materials
Showing up to an installation without the right tools is the fastest way to end up with crooked brackets and patched walls. Lay everything out before you start.
| Tool or material | Purpose |
|---|---|
| Measuring tape | Accurate width, height, and depth readings |
| Pencil | Marking bracket and anchor positions |
| Level | Keeping brackets perfectly horizontal |
| Drill and drill bits | Creating pilot holes for screws |
| Screwdriver | Tightening hardware securely |
| Wall anchors | Supporting weight in drywall without studs |
| Stud finder | Locating studs for heavy treatments |
| Ladder | Safe reach for high windows |
A few optional but helpful additions:
- Painter’s tape for marking bracket positions before committing
- A helper for holding long curtain rods steady
- Touch-up paint for any small wall nicks
Proper tools ensure a secure, straight installation and reduce the chances of damage to your walls or window frame. Bookmark the full 1-hour DIY guide for a quick-reference checklist you can print and bring to the job.
Pro Tip: Pre-drill pilot holes slightly smaller than your screw diameter. This prevents drywall cracking and gives screws a much stronger grip.
Once your tools are ready, you can make the right design and fit choices for your room.
Choosing the best window treatment for each room
Not every room needs the same solution. A blackout shade that works perfectly in a bedroom would feel heavy and out of place in a bright kitchen. Match the treatment to the room’s purpose first, then focus on style.
| Room | Best treatment | Key reason |
|---|---|---|
| Bedroom | Blackout curtains or cellular shades | Maximum light block and insulation |
| Living room | Sheer panels with drapes | Light control plus style |
| Kitchen | Roller shades or café curtains | Easy to clean, moisture-resistant |
| Bathroom | Faux wood blinds or waterproof shades | Humidity-resistant materials |
| Home office | Solar shades | Glare reduction while keeping the view |
Specific styles can save up to 32% on energy costs, so the choice you make has real financial consequences beyond aesthetics. Cellular shades, for example, trap air in their honeycomb pockets, creating a natural insulating barrier.
When choosing fabric, think about how much light you want to filter and how easy the material is to clean. Our fabric tips for window treatments break down which materials hold up best in high-traffic rooms. For a broader overview of styles, the guide on best window treatments by type is a great starting point.
Pro Tip: For homes with young children, look for cordless or motorized options. They eliminate strangulation hazards and are just as easy to operate.
With your chosen style and materials, next comes the most hands-on part: accurate measuring.
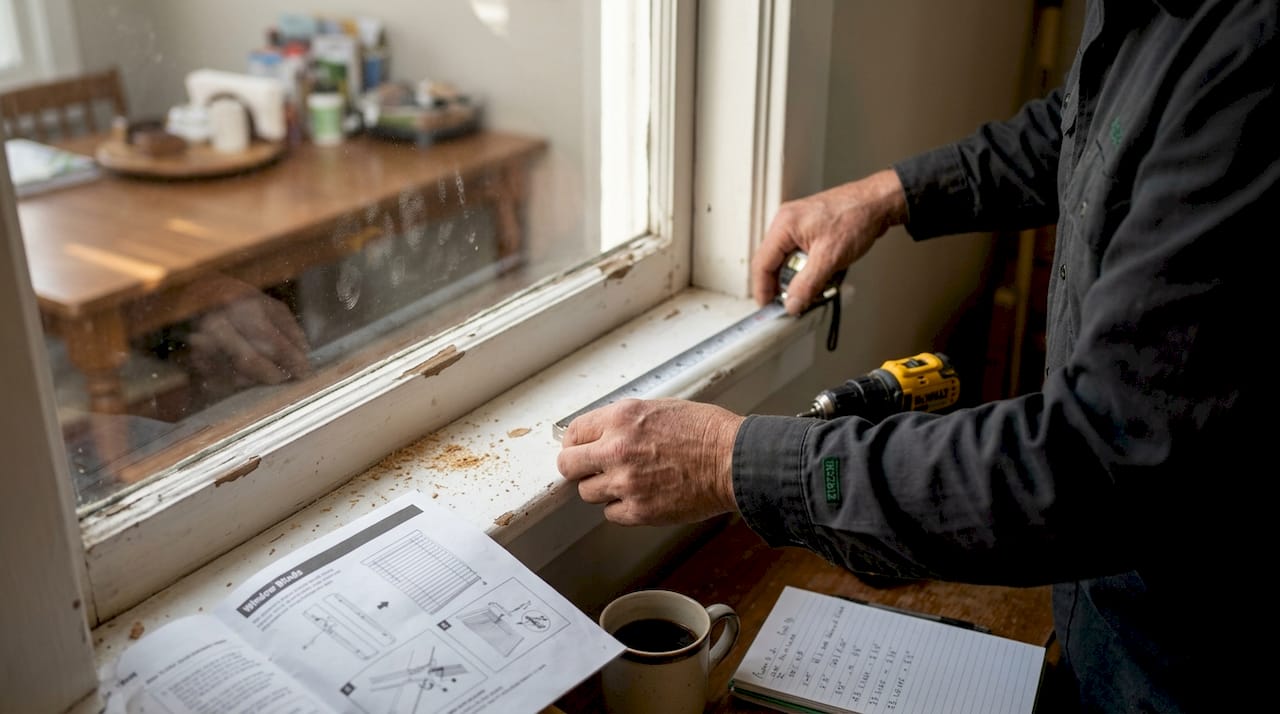
Measuring your windows: The crucial step
A beautiful fabric choice means nothing if the measurements are off. Incorrect sizing leads to gaps, bunching, or treatments that simply won’t operate smoothly. Take your time here.
Inside mount (treatment fits within the window frame):
- Measure the width at the top, middle, and bottom of the frame. Use the narrowest measurement.
- Measure the height on the left, center, and right. Use the shortest measurement.
- Check the depth of the frame to confirm your hardware will fit without hitting the glass.
Outside mount (treatment extends beyond the frame):
- Decide how far beyond the frame you want the treatment to extend on each side, typically 2 to 4 inches.
- Add those extensions to your frame width for total rod or shade width.
- Measure from your desired top position (usually 4 to 6 inches above the frame) down to where you want the treatment to end.
Correct measurement avoids costly mistakes and allows for easy installation the first time. If you run into unfamiliar terms like “return,” “projection,” or “stack-back,” the window treatment terminology guide explains each one clearly.
“Measure twice, cut once” is old advice for a reason. With window treatments, a half-inch error can mean ordering an entirely new panel.
Pro Tip: Always record measurements in a simple table with the window name, width, and height. This prevents mix-ups when ordering multiple treatments for different rooms.
With precise measurements on hand, you’re ready for installation day.
Step-by-step window treatment installation
Follow these steps in order and you’ll have a straight, secure installation every time. Rushing any stage is where most DIY projects go sideways.
- Mark bracket positions. Hold the bracket against the wall at your measured height. Use a pencil to mark the screw holes. Use your level to confirm the mark is perfectly horizontal before drilling.
- Drill pilot holes. Drill at each pencil mark. If you hit a stud, use wood screws. If you’re in drywall only, insert wall anchors before screwing.
- Attach the brackets. Screw each bracket firmly into place. Give them a firm tug to confirm they won’t shift under the weight of your treatment.
- Mount the rod or headrail. Slide the rod into the brackets or snap the headrail into place according to the manufacturer’s instructions. Check with your level one more time.
- Hang panels or shades. For curtains, thread the rod through the panel headers or attach rings. For shades or blinds, clip or lock the headrail into the mounted brackets.
- Test operation. Open and close the treatment several times. Blinds should tilt smoothly, shades should raise and lower evenly, and curtains should slide without catching.
- Final alignment check. Step back and look at the treatment from across the room. Adjust bracket height or panel spacing if anything looks uneven.
Following systematic steps ensures a secure, straight fit and cuts your total installation time significantly.
“The final step most people skip is the ‘walk-away test.’ Step back 10 feet and look at the window fresh. Small alignment issues become obvious from a distance.”
Pro Tip: For heavy drapes, always locate at least one stud per bracket side. A stud finder takes 30 seconds and prevents a treatment from pulling out of the wall weeks later.
Even the best plans can encounter hiccups. Let’s prepare you to troubleshoot like a pro.
Troubleshooting and common mistakes
Most installation problems fall into a short list of predictable errors. Knowing them in advance means you can fix them fast or avoid them entirely.
Common mistakes and fixes:
- Misaligned brackets: Use a level and re-mark before drilling. If brackets are already in, loosen them, adjust, and re-tighten.
- Treatment hangs too low or too high: Standard placement is 4 to 6 inches above the frame. Remount brackets at the correct height and patch the old holes with spackle.
- Hardware pulls out of the wall: The anchor wasn’t rated for the weight. Remove, insert a heavier-duty anchor, and remount.
- Uneven panel lengths: Check that both brackets sit at exactly the same height. Even a quarter-inch difference is visible from across the room.
- Shade won’t roll evenly: The headrail may be slightly tilted. Loosen one bracket, adjust, and re-tighten.
Some errors can be corrected without removing the treatment entirely, which saves time and avoids extra wall damage.
Pro Tip: Keep a small container of spackle and matching touch-up paint on hand during any installation. Quick patches dry in under an hour and make the wall look untouched.
“If a bracket feels even slightly wobbly after installation, fix it immediately. A loose bracket under a heavy drape will eventually fail.”
Knowing when to call a professional is also smart. Motorized systems, very large windows, or treatments over 10 feet high are situations where a pro’s experience pays for itself.
With all steps and solutions addressed, let’s look at what your finished space should look like.
What to expect: Results and finishing touches
A well-installed window treatment has a few unmistakable qualities. The hardware sits flush and level, the fabric hangs without twisting, and the treatment operates smoothly every time. Well-installed window treatments make a room feel bigger and more inviting, which is a detail that guests notice immediately.
Finishing touches that elevate the final look:
- Press or steam fabric panels before hanging to remove packaging creases
- Hem curtains to the correct floor length: a half-inch above the floor for a clean look, or 1 to 3 inches of puddle for a dramatic effect
- Upgrade hardware with decorative finials, rings, or holdbacks that match your room’s metal tones
- Train drapes by folding and tying them loosely for 48 hours so they hang in neat, even folds
Routine maintenance keeps treatments looking fresh:
- Dust blinds and shades weekly with a microfiber cloth
- Vacuum fabric panels on a low setting monthly
- Spot-clean stains immediately before they set
- Check hardware tightness every six months
Pro Tip: Before you finalize your curtain length, read through our guide on how to choose window curtains for length and fullness ratios that make panels look custom-made.
For even more ways to personalize your home, explore designer fabrics and expert assistance below.
Designer fabrics and expert help for your next project
You’ve put in the work to measure, choose, and install your treatments like a pro. Now it’s time to make sure the fabric lives up to the effort. At Beautiful Window Elgin, we carry an extensive selection of designer fabrics by the yard, from embroidered cottons to jacquard satins, so you can source exactly what your room needs without settling for off-the-shelf options.

For outdoor spaces or rooms with high humidity, our waterproof canvas for outdoor windows is a durable, stylish solution that holds up through every season. Whether you’re completing a single window or outfitting an entire home, our team is available for design consultations and custom drapery appointments to help you get the result you’re picturing.
Frequently asked questions
What are the most common mistakes when installing window treatments?
The most frequent mistakes include incorrect measurements, misaligned brackets, and using hardware that isn’t rated for the treatment’s weight. Proper tools and preparation reduce measurement and alignment errors significantly.
How do I choose the best window treatment style for my room?
Consider privacy needs, light control, insulation, decor style, and how easy the treatment is to clean. Different styles deliver distinct energy savings and visual effects, so matching style to function first leads to the best outcome.
What tools are essential for DIY window treatment installation?
You need a measuring tape, level, drill, screws or anchors, and a pencil for marking placements. Having correct tools is the single biggest factor in a secure, straight installation.
Can window treatments really improve energy efficiency?
Yes, well-chosen window treatments help reduce energy bills and keep your home more comfortable year-round. Window treatments cut energy costs by up to 25% when properly selected and installed.
Should I install window treatments myself or hire a professional?
Most homeowners can handle standard installations with basic tools and careful measuring. Professionals are recommended for motorized systems, very large windows, or any installation above 10 feet.
Recommended
- Install Window Treatments in 1 Hour: Pro DIY Guide – Shop Designer Fabrics by the Yard | Curtains & Drapery
- Top window treatment styles: 32% energy savings proven – Fabric Store in Columbia, SC | Drapery Making Services
- 7 Essential Window Treatment Fabric Tips for Homeowners – Shop Designer Fabrics by the Yard | Curtains & Drapery
- Types of window treatments: Best picks for South Carolina – Designer Fabrics by the Yard | Drapery Making Services
- DIY Front Door Alarm: Secure Your Home Easily – Safes and Security Direct