


Master curtain measurements for perfect window treatments
You measure your windows carefully, buy curtains that look perfect online, and then they arrive: too short, too narrow, or bunched awkwardly at the sides. This frustrating scenario happens to countless homeowners who assume measuring for curtains is as simple as measuring the window frame. The reality is that proper curtain measurement requires understanding fullness ratios, rod placement, and the differences between ready-made and custom options. This guide will walk you through the exact techniques you need to measure windows correctly for any curtain style, ensuring your window treatments enhance your home’s decor rather than detract from it.
Table of Contents
- Key takeaways
- Common measurement mistakes and why they matter
- Step by step guide to measuring your windows for curtains
- Comparing measurements for ready-made vs custom curtains
- Additional factors to consider when measuring curtains
- Enhance your home with perfectly measured curtains
- FAQ
Key Takeaways
| Point | Details |
|---|---|
| Measure beyond frame | Do not measure only the visible glass or the window frame, because you need extra fabric for proper coverage and visual appeal. |
| Rod extension beyond frame | Your rod should extend 4 to 8 inches beyond each side of the frame to allow curtains to stack back fully. |
| Rod height matters | Mount the rod 4 to 6 inches above the window frame for a standard look, or higher for a dramatic effect. |
| Three point measurement | Measure width at left, center, and right and height at top, middle, and bottom, using the largest reading to ensure full coverage. |
| Curtain length options | The ideal curtain length is either kissing the floor, floating about half an inch above it, or puddling 1 to 3 inches for a formal appearance. |
Common measurement mistakes and why they matter
The most frequent error homeowners make is measuring only the visible glass or the window frame itself. Many homeowners incorrectly measure only the window frame, ignoring the extra fabric needed for proper coverage and visual appeal. This approach creates curtains that expose light gaps on the sides, fail to reach the floor gracefully, or look stretched and flat across the window.
Another common mistake involves ignoring the curtain rod width. Your rod should extend 4 to 8 inches beyond each side of the window frame to allow curtains to stack back fully when open. If you measure only the frame width and order curtains to match, you’ll end up blocking natural light even when the curtains are pulled aside. The rod placement height also matters tremendously. Mounting your rod too close to the window top makes ceilings appear lower, while placing it near the ceiling creates an illusion of height and elegance.
Overlooking curtain fullness creates perhaps the most visually disappointing result. Curtains should have enough fabric to create soft folds and gathers when closed. A flat panel stretched across a window looks cheap and unfinished, regardless of fabric quality. Professional designers typically recommend fabric width of 1.5 to 2.5 times the window width for standard curtains, and up to 3 times for sheers or formal draperies.
Height miscalculations also plague DIY curtain projects. Measuring from the wrong starting point or failing to account for header styles leads to curtains that hover awkwardly above the floor or puddle excessively. The ideal length depends on your desired look: curtains should either kiss the floor, float about half an inch above it, or puddle 1 to 3 inches for a formal appearance.
Pro Tip: Always measure your window width and height at three different points (left, center, right for width; top, middle, bottom for height) and use the largest measurement. Windows are rarely perfectly square, and this approach ensures your curtains will cover the entire opening without gaps.
Step by step guide to measuring your windows for curtains
Accurate curtain measurement follows a systematic process that accounts for both the window itself and the surrounding wall space. Start by gathering the right tools: a metal tape measure (cloth measures can stretch and provide inaccurate readings), a notepad, and a pencil. Having a helper makes the process easier, especially for large windows.
-
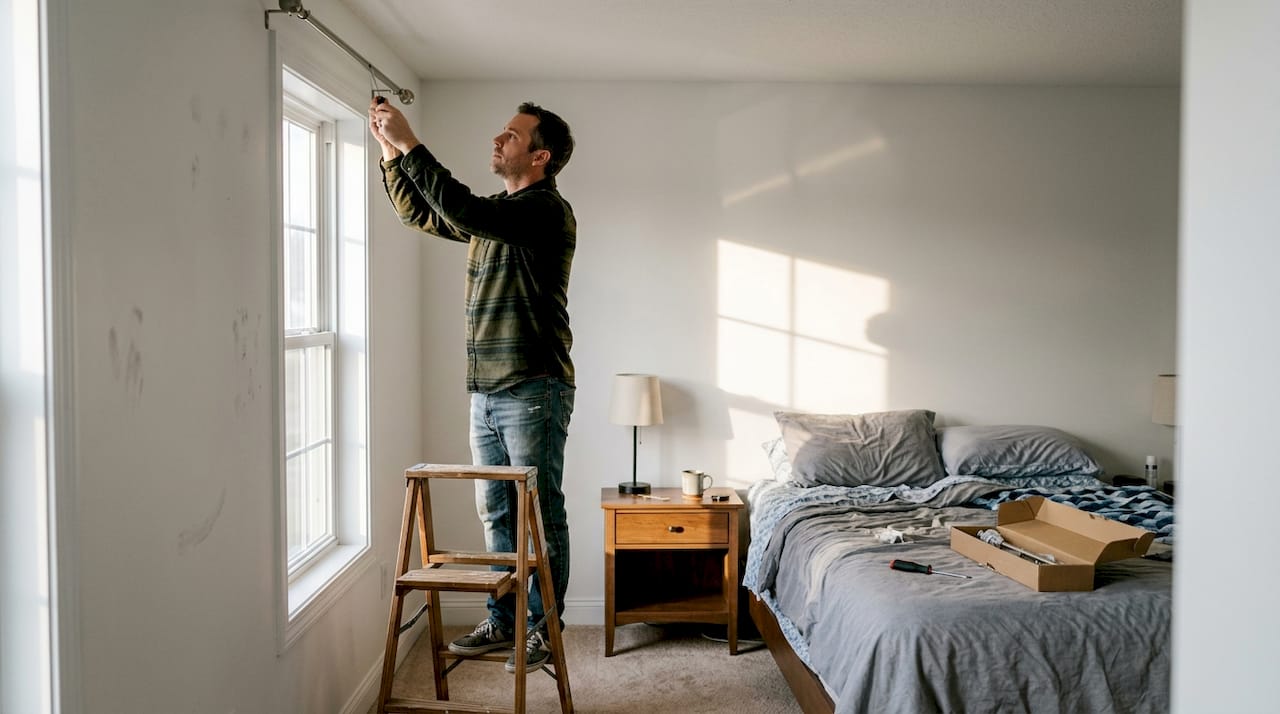
Determine rod placement height. Decide where you’ll mount your curtain rod before taking any measurements. For a standard look, place the rod 4 to 6 inches above the window frame. For a dramatic, ceiling-heightening effect, mount it halfway between the window top and ceiling, or even at the ceiling itself. Mark this height lightly with a pencil.
-
Measure the width. Measure from the outer edges where your rod brackets will be mounted, not the window frame. Your rod should extend 4 to 8 inches beyond each side of the frame to allow curtains to stack back completely. Record this bracket-to-bracket measurement. This becomes your rod width, and your curtain panels should be 1.5 to 3 times this width depending on desired fullness.
-
Measure the height. Start from your marked rod placement height and measure down to your desired endpoint. For floor-length curtains, measure to about half an inch above the floor to prevent dragging and wear. For sill-length curtains, measure to the bottom of the window sill. For apron-length curtains, measure to about 4 inches below the sill. Add 2 to 4 inches if you want a slight puddle effect.
-
Account for header style. Different curtain styles affect measurement requirements significantly. Rod pocket curtains sit below the rod, so your measurement from the rod down is your finished length. Grommet or eyelet curtains hang from the rod, so subtract 1 to 2 inches from your measurement to account for the grommet height. Tab-top curtains also hang from the rod, requiring similar adjustments. Pinch pleat or ripple fold curtains mounted on traverse rods need precise measurements from the track or rod.
-
Calculate fullness multiplier. Multiply your rod width by your chosen fullness ratio. For standard cotton or linen curtains, use 2 to 2.5 times. For sheer fabrics that need more gathering to provide privacy, use 2.5 to 3 times. For flat panels or modern minimalist looks, 1.5 times may suffice. This calculation gives you the total fabric width needed across all panels.
-
Adjust for panel configuration. Decide whether you want one panel that pulls to one side or two panels that meet in the middle. For two panels, divide your total fabric width by two. Each panel should be at least this width when flat. Most ready-made curtains list their flat panel width, making this calculation essential for proper coverage.
Pro Tip: Use a metal tape measure and record every measurement twice before ordering. Take photos of your windows with measurements written on paper in the frame for future reference. These photos become invaluable if you need to order additional panels or help from professionals.
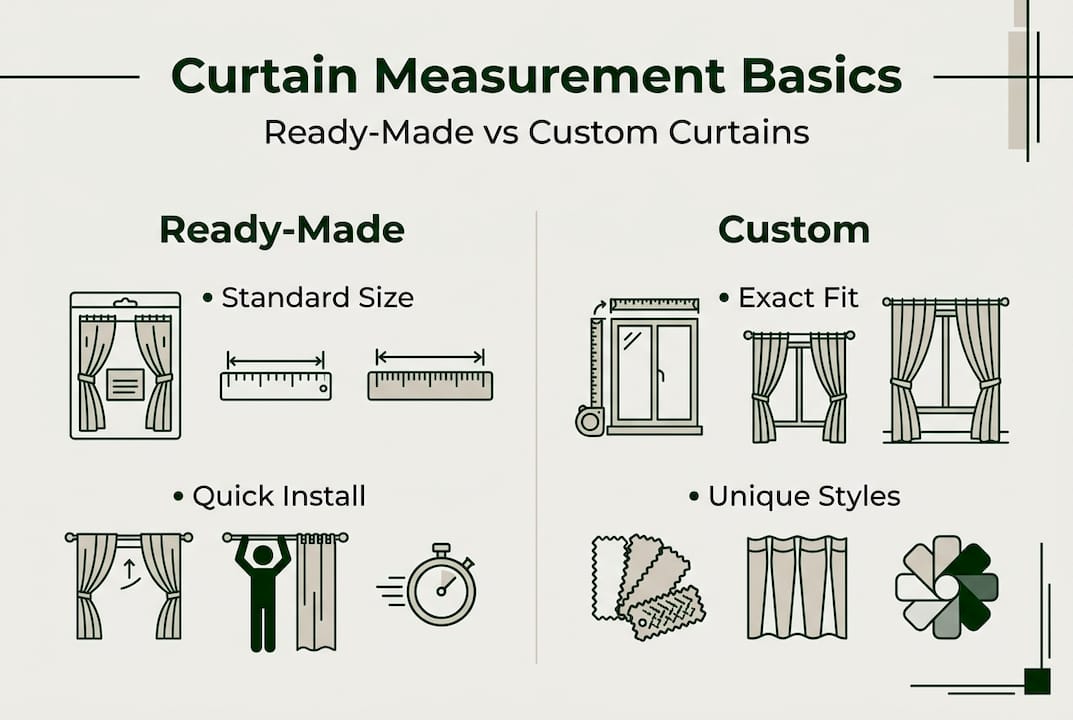
Comparing measurements for ready-made vs custom curtains
The measurement approach differs significantly between ready-made and custom curtains, and understanding this distinction helps you choose the right option for your windows. Ready-made curtains often require standard measurements with less flexibility, while custom curtains accommodate exact dimensions.
Ready-made curtains come in standard lengths like 63, 84, 95, 108, and 120 inches, with widths typically ranging from 42 to 54 inches per panel. When measuring for ready-made options, you select the closest standard size that meets or exceeds your measurements. If your window needs 92 inches of length, you’d purchase 95-inch panels. This approach works well for standard rectangular windows but becomes problematic for unusual sizes or when you want a precise, tailored look.
Custom curtains require exact measurements because they’re made specifically for your windows. You provide the precise width and length you need, and the workroom creates panels to those specifications. This precision eliminates the guesswork and compromise inherent in ready-made shopping. You also control fullness ratios, header styles, lining options, and hem details that affect the final measurement.
| Feature | Ready-Made Curtains | Custom Curtains |
|---|---|---|
| Measurement precision | Round to nearest standard size | Exact measurements to the inch |
| Width options | Limited to standard panel widths | Any width needed for proper fullness |
| Length options | Standard increments only | Precise length including puddle or float |
| Turnaround time | Immediate purchase | 4 to 8 weeks for fabrication |
| Price point | Lower cost per panel | Higher investment for perfect fit |
| Style flexibility | Limited header and hem options | Complete customization of details |
Ready-made curtains offer several advantages for straightforward window treatments. They provide immediate solutions, lower costs, and work well when your measurements align with standard sizes. They’re ideal for rental properties, temporary solutions, or windows where a perfect fit isn’t critical. However, they limit your fabric choices, style options, and precision.
Custom curtains excel when windows have unusual dimensions, when you want specific fabrics or styles, or when achieving a polished, designer look matters. They accommodate tall ceilings, extra-wide windows, arched openings, or bay window configurations that ready-made options can’t address. The custom drapery process involves detailed measurements, fabric selection, and professional fabrication that results in window treatments tailored precisely to your space.
Consider ready-made curtains when your windows fit standard dimensions and you need a quick, budget-friendly solution. Choose custom curtains when you want specific fabrics, perfect proportions, or professional results that elevate your interior design.
Additional factors to consider when measuring curtains
Beyond basic width and height, several nuanced factors influence how you measure for curtains and the final appearance of your window treatments. Understanding these elements ensures your measurements translate into curtains that function beautifully and enhance your space.
Rod placement height dramatically affects both measurements and visual impact. Mounting rods at ceiling height makes rooms feel taller and more spacious, but requires longer curtain panels and precise measurements to avoid gaps at the bottom. Standard placement 4 to 6 inches above the frame offers a balanced look and easier measurement. Consider your ceiling height, window proportions, and desired aesthetic when choosing rod placement, as this decision determines your starting measurement point.
Window trim and sill shapes add complexity to measurements. Deep window sills may require curtains to extend beyond the sill to avoid awkward bunching. Protruding trim means your rod brackets need spacers to allow curtains to hang straight without catching on the trim. Measure the depth of any protrusions and ensure your rod brackets accommodate this spacing. For windows with radiators or furniture beneath them, sill-length curtains measured to clear these obstacles work better than floor-length panels.
Curtain fullness ratios transform the same fabric into dramatically different looks. Sheers need more fullness (2.5 to 3 times window width) because the lightweight fabric requires more gathering to provide privacy and visual weight. Heavy fabrics and installation considerations affect how much fullness looks appropriate. Blackout curtains often use less fullness (1.5 to 2 times) because the thick fabric creates adequate coverage without excessive gathering. Layered treatments with sheers behind heavier curtains require calculating fullness for each layer separately.
| Curtain Style | Recommended Fullness | Measurement Multiplier |
|---|---|---|
| Sheer or voile | Maximum gathering | 2.5 to 3 times rod width |
| Standard cotton or linen | Medium fullness | 2 to 2.5 times rod width |
| Blackout or thermal | Moderate fullness | 1.5 to 2 times rod width |
| Flat panels (modern) | Minimal gathering | 1.25 to 1.5 times rod width |
| Formal pinch pleat | Traditional fullness | 2.5 times rod width |
Hardware considerations also impact measurements. Decorative finials add length to your rod, so measure the full width including these end pieces when calculating bracket placement. Traverse rods for draw curtains require specific measurements for the track length and stack-back space. Tension rods work only within the window frame, limiting your ability to extend measurements beyond the frame for better coverage.
Tricky window situations demand creative measurement approaches. Bay windows require measuring each section separately and often benefit from custom solutions that accommodate the angles. Corner windows need careful planning to avoid curtains interfering with each other. Sliding glass doors require measuring for both coverage and functionality, ensuring curtains stack back far enough to allow easy door access.
Pro Tip: For rooms with multiple windows, measure each window separately even if they appear identical. Construction variations mean windows in the same room can differ by several inches. Ordering curtains based on one window’s measurements may result in poor fit on others.
Enhance your home with perfectly measured curtains
Now that you understand how to measure windows accurately for any curtain style, you can confidently select fabrics and designs that transform your space. Precise measurements form the foundation of beautiful window treatments, but the fabric quality and style choices determine the final impact.

Beautiful Windows Elgin offers an extensive collection of designer fabrics perfect for custom curtain projects. Whether you need elegant sheers, rich velvets, durable cottons, or specialty fabrics, you’ll find options that match your measurements and design vision. Our designer fabrics by the yard give you complete control over your window treatment projects, allowing you to create curtains that fit your exact specifications.
For outdoor spaces or moisture-prone areas, consider our silver waterproof canvas fabric that withstands the elements while maintaining style. The 60-inch width simplifies calculations for wider windows and reduces seaming. Our fabrics work beautifully for both DIY projects and professional workroom fabrication, giving you flexibility in how you bring your measured curtain plans to life.
FAQ
How do I measure curtains for different window shapes?
For arched windows, measure the width at the widest point and the height from the arch peak to your desired endpoint. Bay windows require measuring each section separately and adding the widths together for total fabric needs. Unusual shapes often benefit from custom solutions that accommodate the unique dimensions rather than forcing standard measurements.
What is the best way to measure for curtain fullness?
Multiply your rod width by 1.5 to 3 depending on the fabric weight and style you want. Lightweight sheers need more fullness (2.5 to 3 times) to create privacy and visual interest, while heavier fabrics look best with moderate fullness (2 to 2.5 times). More fullness creates elegant gathers and a luxurious appearance.
Can I use the same measurements for ready-made and custom curtains?
No, ready-made curtains require rounding your measurements to the nearest standard size, while custom curtains use your exact measurements. Ready-made options work when standard sizes fit your windows adequately, but custom curtains provide precise fit for unusual dimensions. The ready-made curtains guide explains how to select appropriate standard sizes for your measurements.
Should curtains touch the floor or float above it?
Curtains should either kiss the floor with no gap, float about half an inch above for easy opening and cleaning, or puddle 1 to 3 inches for a formal look. Avoid the awkward gap of 2 to 6 inches above the floor, which makes curtains appear too short. Your measurement should account for your chosen length style.
How do I measure for curtains if my windows aren’t level?
Measure the height at the left, center, and right sides of the window and use the longest measurement to ensure complete coverage. If the difference exceeds 2 inches, consider adjusting your rod placement to compensate or choosing custom curtains with uneven hems. This approach prevents gaps at the bottom where the window sits lower.
Recommended
- Drapery Fabric Selection Guide for Custom Window Treatments – Shop Designer Fabrics by the Yard | Curtains & Drapery
- 7 Essential Window Treatment Fabric Tips for Homeowners – Shop Designer Fabrics by the Yard | Curtains & Drapery
- Install Window Treatments in 1 Hour: Pro DIY Guide – Shop Designer Fabrics by the Yard | Curtains & Drapery
- Types of window treatments: Best picks for South Carolina – Designer Fabrics by the Yard | Drapery Making Services