


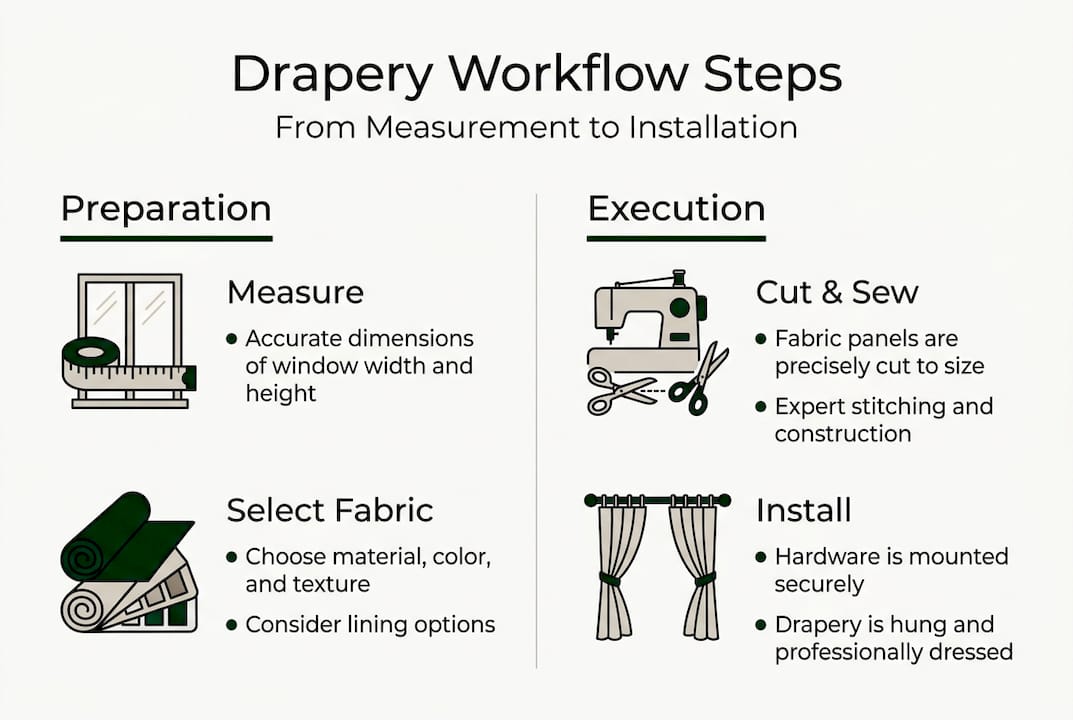
Step-by-step custom drapery workflow for flawless results
Custom drapery projects have a way of looking effortless when done right and painfully obvious when they go wrong. A panel that falls two inches short, fabric that puckers after the first wash, or a rod that barely clears the window frame can turn a beautiful design vision into a costly redo. The good news is that most of these problems are entirely preventable. A structured, repeatable workflow keeps every phase of your project on track, from the first measurement to the final press. This guide walks you through each critical step so your custom drapery looks polished, fits perfectly, and lasts for years.
Table of Contents
- Understanding the custom drapery process
- Get started: Tools, materials, and prep
- Measuring for perfection: Window and rod calculations
- Calculating fabric yardage: Getting it right the first time
- From cut to finish: Fabrication steps for professional quality
- Double-checking your work and installation tips
- Explore our custom drapery fabric collection
- Frequently asked questions
Key Takeaways
| Point | Details |
|---|---|
| Accurate measurement | Proper measuring of window, rod, and desired length is the single greatest predictor of drapery success. |
| Plan fabric needs | Calculate fabric yardage with header and hem allowances and always round up to avoid shortages. |
| Prep and fabrication | Pre-wash fabric, follow professional steps, and use quality materials for a designer result. |
| Double-check and install | Careful inspection and expert installation transform homemade into high-end custom drapery. |
Understanding the custom drapery process
Custom drapery is not simply a longer version of buying ready-made curtains. It is a tailored process that accounts for your specific window dimensions, your preferred header style, your fabric weight, and the overall aesthetic of your room. That level of personalization is exactly what makes it worth the effort. Professionals follow a repeatable methodology for each custom drapery project, moving through defined phases rather than improvising as they go.
The core workflow phases are: planning and design, measuring, material selection, fabrication, and installation. Each phase builds on the one before it. Skipping or rushing any stage creates problems that compound later. Understanding the custom curtain advantages over off-the-shelf options helps clarify why this process is worth following carefully.
Here is a quick comparison of custom versus ready-made drapery:
| Feature | Custom drapery | Ready-made curtains |
|---|---|---|
| Fit | Exact window dimensions | Standard sizes only |
| Fabric choice | Full selection | Limited options |
| Header styles | Any style | Pre-set style |
| Lining options | Fully customizable | Rarely available |
| Longevity | Higher with quality fabric | Variable |
The benefits of going custom are clear. You control the fit, the fabric, and the finish. Exploring the range of curtain style options early in the planning phase helps you make informed decisions before you spend a dollar on materials.
Key advantages of custom drapery at a glance:
- Perfect fit for any window shape or size
- Coordinated design across multiple rooms
- Full control over fabric weight, texture, and pattern
- Choice of header style to match your decor
- Option to add lining, interlining, or blackout layers
Get started: Tools, materials, and prep
Before you begin measuring or cutting, make sure you have all the right tools and your fabric is prepped properly. Walking into a project without the right equipment leads to inaccurate cuts and wasted material.
Essential tools and materials:
| Tool or material | Purpose |
|---|---|
| Steel measuring tape | Accurate window and rod measurements |
| Fabric scissors | Clean, straight cuts |
| Dressmaker pins | Securing fabric layers |
| Drapery weights | Ensuring panels hang straight |
| Calculator | Yardage and fullness calculations |
| Iron and pressing cloth | Pre-pressing and finishing |
| Seam ripper | Correcting sewing errors |
| Sewing machine | Hemming and header construction |
Once your tools are assembled, follow these preparation steps in order:
- Clear and level your workspace so fabric lies flat without bunching.
- Review your fabric selection tips before purchasing to confirm your chosen material suits the project.
- Pre-wash fabric whenever possible to prevent post-installation shrinkage, especially with natural fibers like cotton and linen.
- Press the fabric smooth before cutting to eliminate distortion.
- Check fabric grain by pulling a thread across the width to confirm it is straight.
- Review [fabric care tips](https://www.beautifulwindowselgin.com/blogs/read-our-blog-for-sewing-inspiration/window-treatment fabric tips for homeowners) specific to your chosen material before proceeding.
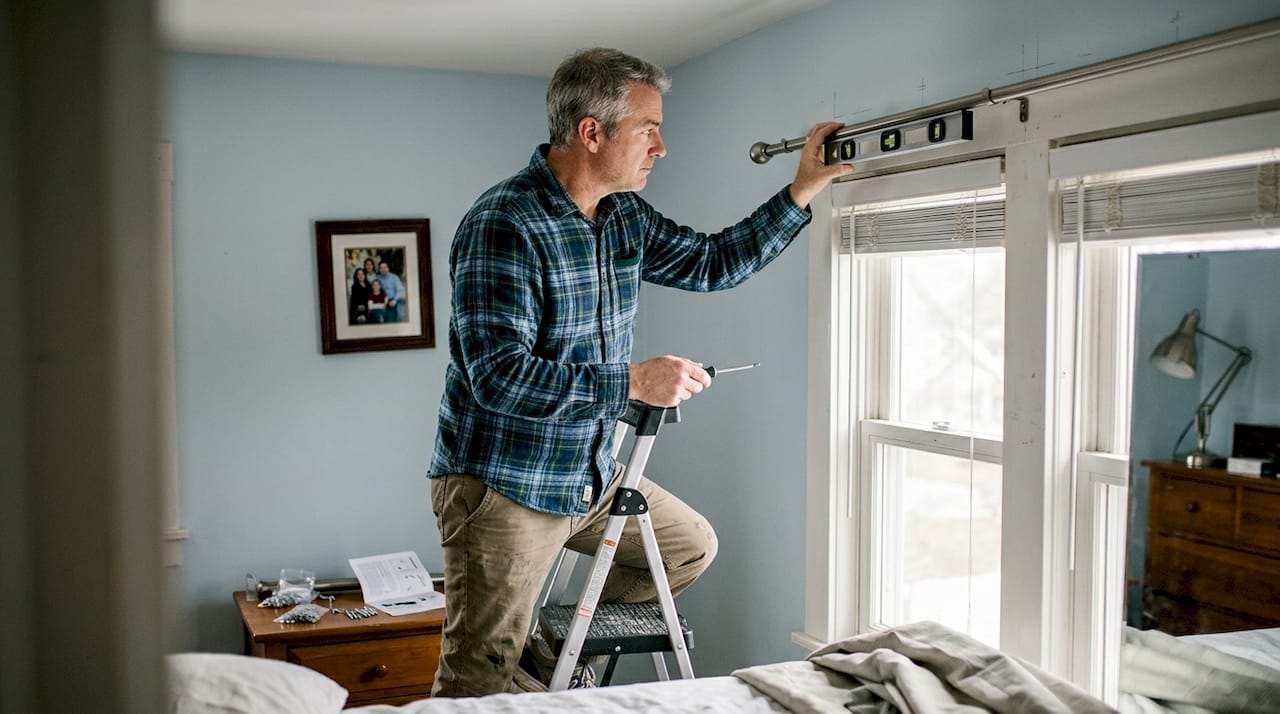
Pro Tip: Mounting your rod 6 to 12 inches above the window frame and extending it well past each side creates the illusion of taller, wider windows. Ripple fold headers work especially well with this approach because their uniform wave pattern draws the eye upward and adds a refined, modern look to any room.
Measuring for perfection: Window and rod calculations
With materials ready, accurate measurements set the foundation for a great drape. This is the step where most DIY projects go wrong, and the fix is simple: measure more than once and account for every variable.
Start with the rod placement. The rod should extend 8 to 12 inches past each side of the window, and you should measure height from the rod down to the floor with adjustments for your desired drape style. A floor-length panel typically ends half an inch above the floor for a clean look, or up to an inch below for a slight puddle effect.
For width, measure the total rod length from bracket to bracket. This is your finished width before applying fullness. For height, measure from the top of the rod (or ring) down to your desired hem point. Use these curtain measurement tips to avoid the most common sizing errors.
Common measuring mistakes to avoid:
- Measuring only the window frame width instead of the full rod span
- Forgetting to add rod extension on both sides
- Not accounting for header height above the rod
- Ignoring hem allowances at the bottom
- Measuring height from the window sill instead of the rod
Fullness recommendations by header type:
- Pleated headers: 2 to 2.5 times the finished width
- Rod pocket headers: 2 to 3 times the finished width
- Ripple fold headers: 1.8 to 2 times the finished width
- Grommet headers: 1.5 to 2 times the finished width
For a practical example: a window with a rod spanning 80 inches, using a pinch pleat header at 2.5 times fullness, requires a finished panel width of 200 inches total. Review drapery measurement best practices to confirm your numbers before ordering fabric. Choosing the right fabric for your measurements is equally important, and choosing fabrics confidently helps you match weight and drape quality to your header style.
Calculating fabric yardage: Getting it right the first time
With accurate measurements, the next step is ensuring you buy enough fabric for your design without significant waste. Running short mid-project is one of the most frustrating and expensive mistakes you can make, especially with specialty or patterned fabrics.
Here is the standard yardage calculation formula: finished width multiplied by fullness, divided by fabric width, gives you the number of fabric widths needed. Multiply that by the cut length per panel, then divide by 36 to convert inches to yards. Always add extra for hems and headers.
Follow these steps with a concrete example (80-inch rod, 96-inch drop, 2.5 fullness, 54-inch wide fabric):
- Calculate total finished width: 80 inches × 2.5 = 200 inches.
- Divide by fabric width: 200 ÷ 54 = 3.7, round up to 4 fabric widths.
- Add hem and header allowances: 96 inches + 8 inches (4-inch double hem) + 4 inches (header) = 108 inches cut length.
- Multiply widths by cut length: 4 × 108 = 432 inches total.
- Convert to yards: 432 ÷ 36 = 12 yards. Round up to 13 yards for safety.
You can also use a yardage calculator tool to cross-check your math before purchasing. For patterned fabrics, add one full pattern repeat per cut length to ensure alignment across panels. The window treatment fabric guide covers how different fabric types affect yardage needs.
Pro Tip: Always calculate yardage for drapes using the fabric’s usable width, not the selvage-to-selvage width. Most decorator fabrics are 54 inches wide, but the usable width after removing selvages is closer to 52 inches. Using the wrong number leads to panels that fall short of your fullness target.
From cut to finish: Fabrication steps for professional quality
Having calculated what you need, it is time to transform your measurements and fabric into custom drapery panels. Fabrication quality determines whether your finished drapes look handcrafted or homemade.
Follow these steps in sequence for consistent, professional results:
- Square the fabric ends by pulling a thread across the width and cutting along that line.
- Cut each panel to the correct cut length, keeping the grain perfectly straight.
- Sew side hems first using a double-fold of at least 1.5 inches for a clean, weighted edge.
- Construct the bottom hem with a double-folded hem of 4 inches for floor-length panels.
- Insert drapery weights at the bottom corners and seams to encourage straight hanging.
- Build the header according to your chosen style, whether that is a rod pocket, pinch pleat tape, or ripple fold track system.
- Press all seams and hems flat before hanging.
Important: Always double-check your panel length against your measured drop before sewing the final hem. Cutting a panel too short is irreversible. Measure twice, cut once, and hem last.
Refer to the [curtain style process](https://www.beautifulwindowselgin.com/blogs/read-our-blog-for-sewing-inspiration/curtain-style selection process guide) for style-specific fabrication notes. Common fabrication pitfalls include:
- Cutting panels off-grain, which causes twisting after hanging
- Skipping pre-washing, leading to shrinkage after installation
- Using a single-fold hem, which looks thin and unprofessional
- Rushing the header construction, which affects how the panel gathers
For detailed installation tips that complement your fabrication work, review the installation guide before you hang your panels.
Double-checking your work and installation tips
After fabrication, a flawless install is the last step to show off your custom drapery craftsmanship. Before anything goes on the rod, run through a final quality check.
Pre-installation checklist:
- Confirm panel length matches your measured drop on both sides
- Check all seams for consistent stitch quality and no puckering
- Verify hem depth is even across the full width of each panel
- Confirm fullness looks correct when panels are gathered by hand
- Inspect fabric for any marks, pulls, or distortion from cutting
Installing with proper hardware and final pressing brings out the craft in your drapery. Use these expert installation tips for a designer-level finish:
- Mount brackets at equal heights on both sides using a level, not just visual judgment
- Use wall anchors when brackets do not land on studs, especially for heavy drapery
- Press panels one final time after hanging to release any fold lines from storage
- Allow panels to hang for 24 to 48 hours before making any final length adjustments
- Use drapery pins or clips evenly spaced to maintain consistent fullness across the rod
For a complete walkthrough of the installing new curtains process, including hardware selection and bracket spacing, the installation guide covers every detail. Small finishing touches, like steaming the panels after hanging and training the folds by hand, elevate the result from functional to truly refined.
Explore our custom drapery fabric collection
Every step in this workflow depends on one foundational choice: the quality of your fabric. Beautiful Window Elgin carries an extensive selection of designer drapery fabrics, including cotton, embroidered textiles, and jacquard satin, sourced to meet the standards of both professional workrooms and discerning homeowners.
Whether you are sourcing material for a single statement window or outfitting an entire home, the fabric collection at Beautiful Window Elgin offers the variety and quality your project deserves. Sample requests are available so you can evaluate texture, weight, and color in your own space before committing. Design consultations and custom drapery appointments are also offered for clients who want expert guidance from fabric selection through to final installation. Visit beautifulwindowselgin.com to browse the full collection and request your samples today.
Frequently asked questions
How much wider than my window should my drapery rod be?
Your drapery rod should extend at least 8 to 12 inches past each side of the window frame, allowing panels to stack neatly off the glass and maximize natural light when open.
How do I calculate the correct fabric yardage?
Multiply your finished width by your fullness factor, divide by fabric width to get the number of widths needed, then multiply by cut length and convert to yards. Always round up to account for hems and headers.
Should I pre-wash my fabric before making drapery?
Yes. Pre-washing fabric removes sizing and prevents shrinkage after installation, ensuring your panels maintain their intended length and fit over time.
What are the most common mistakes in drapery projects?
The most frequent errors include poor measuring practices, skipping fabric pre-treatment, and underestimating yardage, all of which result in panels that do not fit or look as intended.
Which header style is trending for 2026?
Ripple fold headers remain a leading choice for modern interiors, valued for their clean, uniform wave and smooth operation on compatible track systems.
Recommended
- What is custom drapery process: A 2026 guide – Designer Fabrics by the Yard | Drapery Making Services
- Drapery workrooms 2026: 6-8 week custom projects explained – Designer Fabrics by the Yard | Drapery Making Services
- What Is Custom Drapery and Why It Matters – Shop Designer Fabrics by the Yard | Curtains & Drapery
- Curtain Style Selection Process for Custom Drapery Success – Shop Designer Fabrics by the Yard | Curtains & Drapery